Line things up!

You don’t have to be blessed with, as the Germans say, a fingerspitzengefühl for design to create professional-looking documents. The secret lies in a few basic rules that everyone – with a little bit of effort – can master. Today I discuss one of them: alignment.

Alignment unifies separate elements on a slide or a page. This principle visually organizes the information and shows how items are in one way or another connected to each other.

Slide2
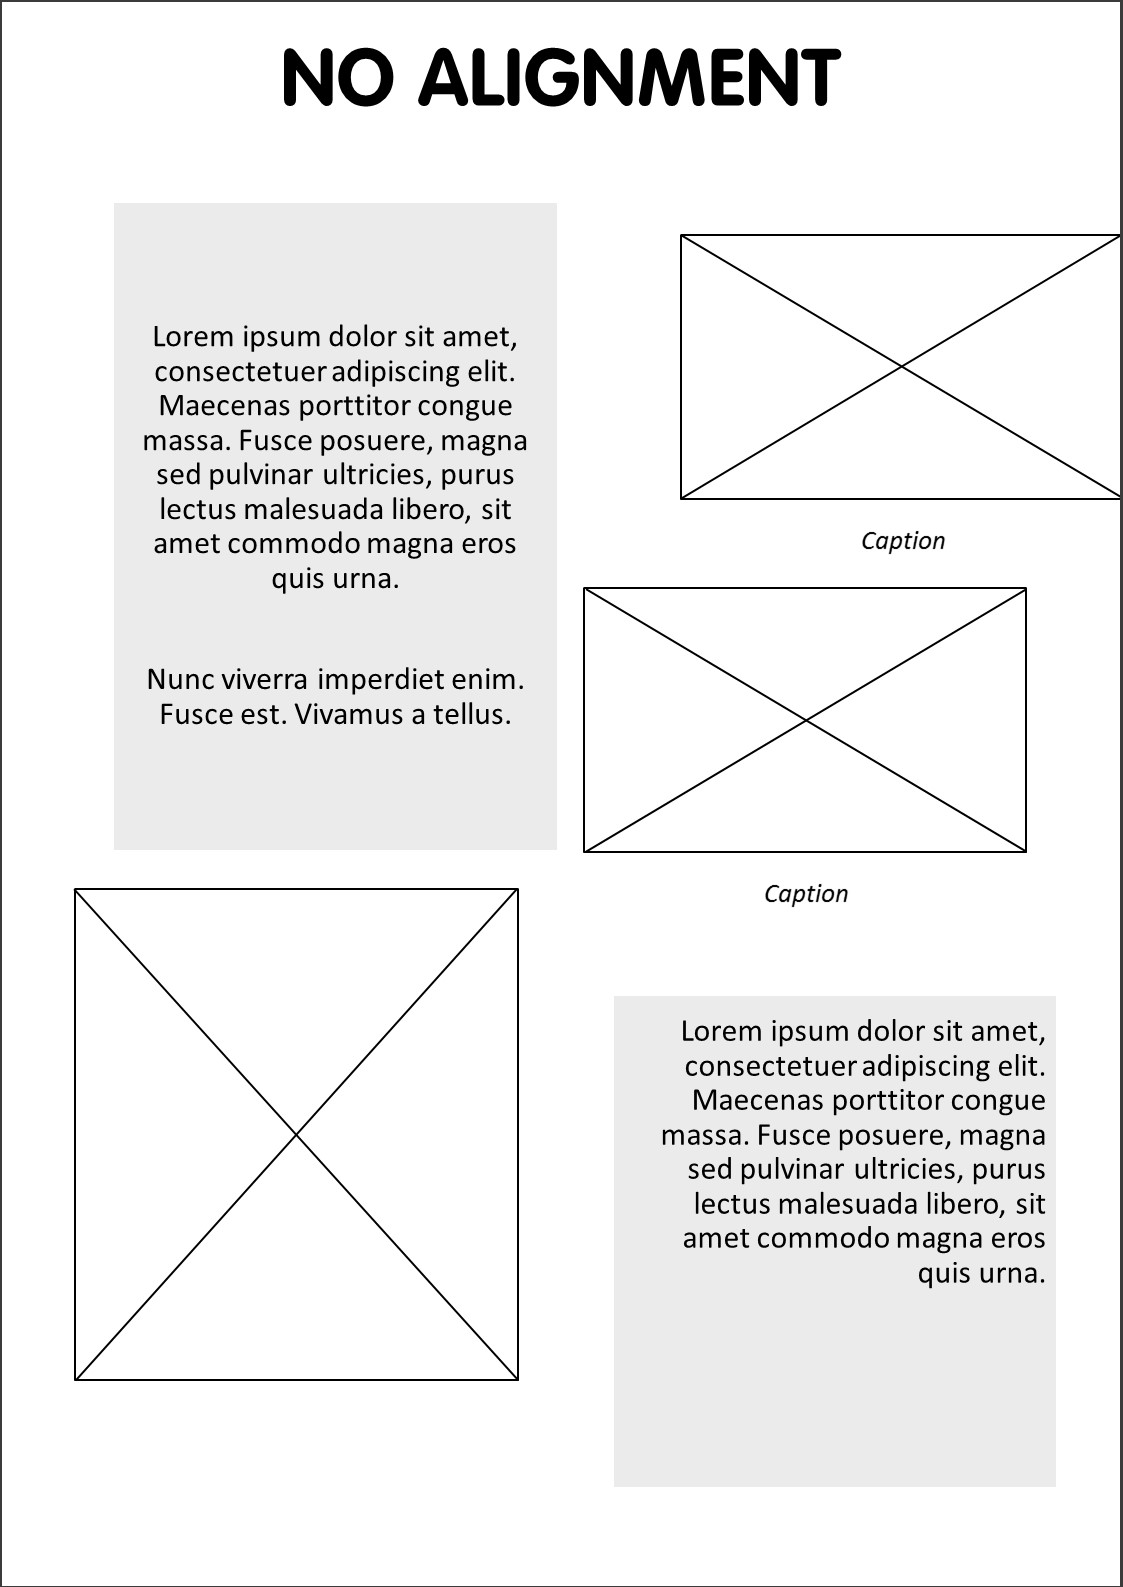
This is an extreme example of a poster with no alignment at all. Title, pictures and text blocks are arbitrarily placed on the page and parts that are closely related to each other are differently aligned. The text is aligned in three different ways: left, right and centered. This is practically a felony in the world of graphic design ;) More common is to choose one type of alignment that you repeat throughout the page. Besides that, centered text is generally not a good idea for professional documents, especially for body text, cause this makes reading more difficult. The poorly arranged poster creates a messy look and confuses the spectator.

Slide3

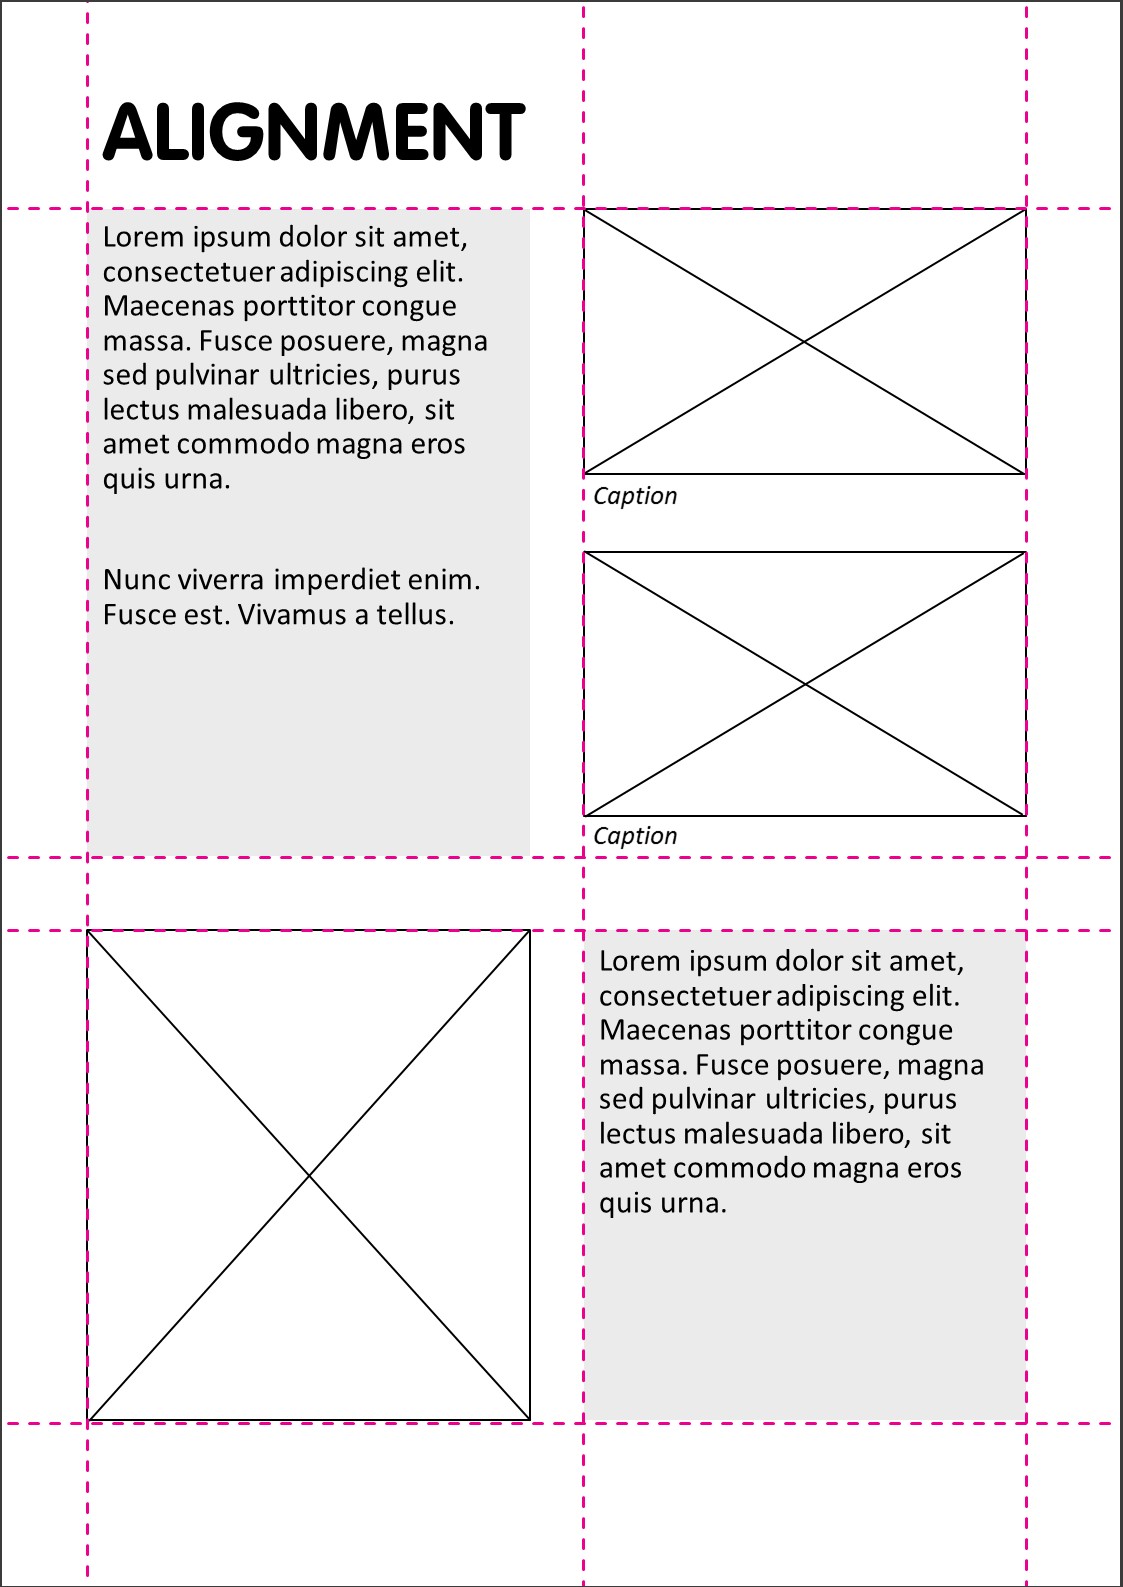
This is the same poster after applying alignment. By following this easy principle the poster looks more elegant and professional. Each item has a visual connection to another item on the page. Note that the elements are not only vertically, but also horizontally aligned, along a baseline.

Try to align consequently. Use for example the same white space between different elements.

As said before, try to avoid centered alignment, this is not as strong as left or right alignment, and creates a less serious look.


How to align in MS Office
Both in PowerPoint and Word you can align selected objects relative to one another. Furthermore, you can align an element to the edge of the slide in PowerPoint, or in Word, to the edge of the page or margin. In PowerPoint you can snap objects to a grid but unfortunately, the option to align objects to drawing guides is missing. Depending on this choice you can check further alignment options: align left, center, right; align top, middle, bottom; distribute horizontally or vertically.

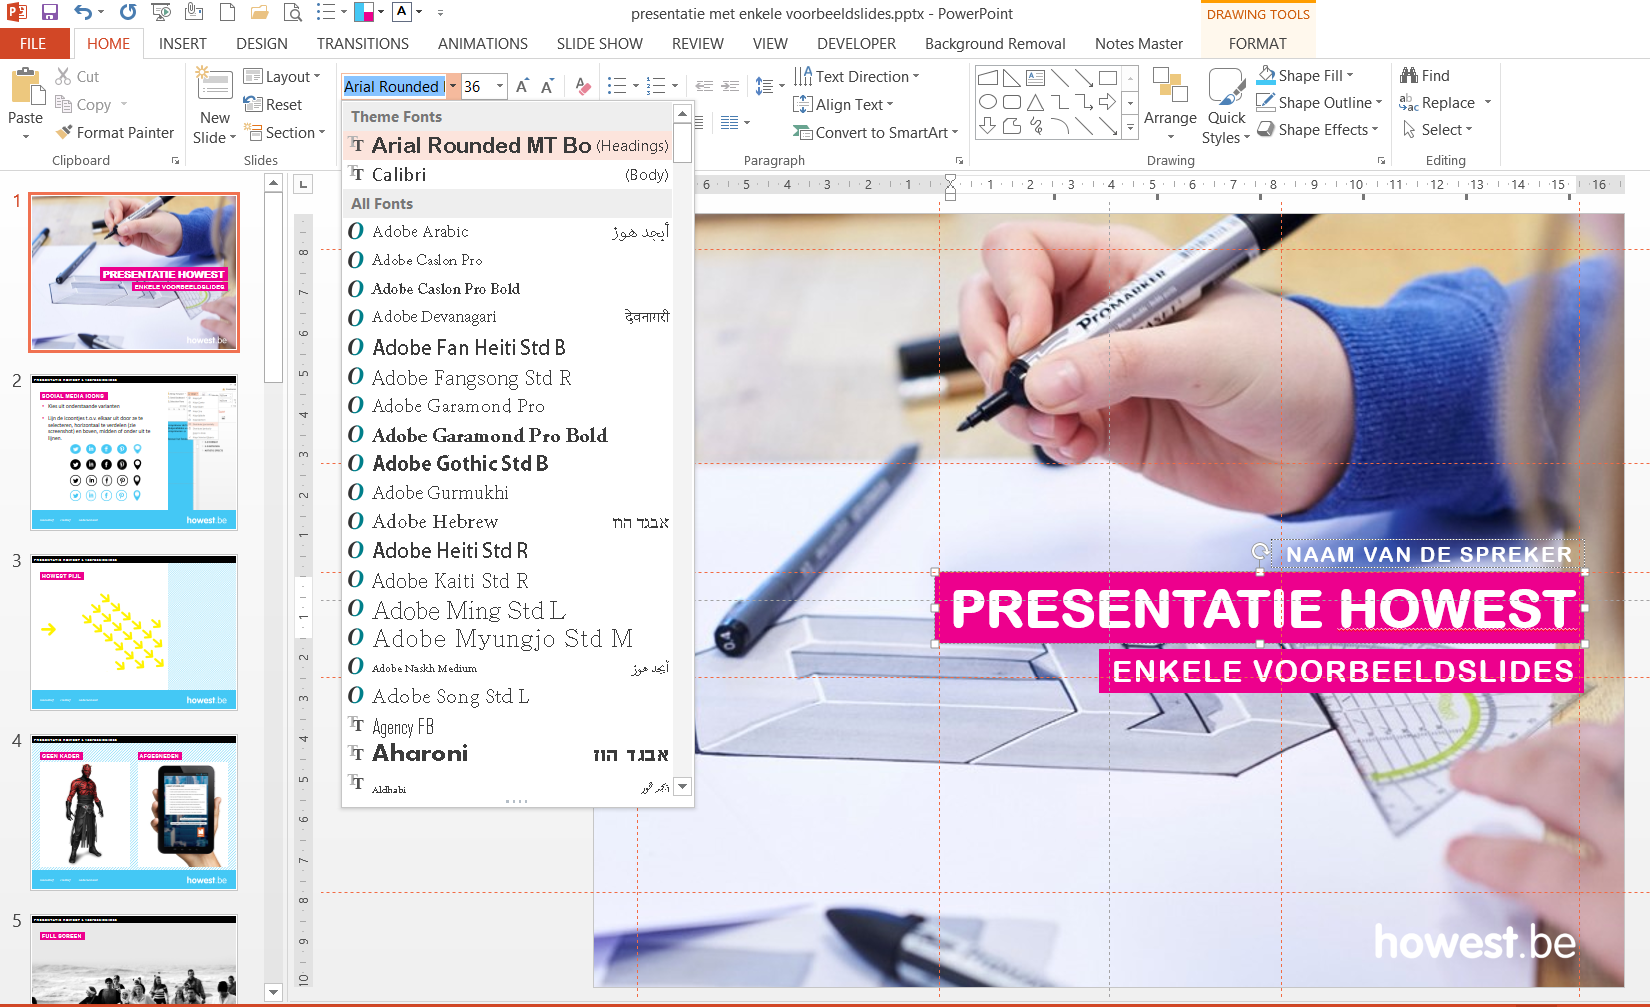
You can find the different align options on the contextual tab Drawing Tools > group Arrange > dropdown menu Align. On the tab Home in the group paragraph you can find the options to align text.

Robin Williams (namesake of the actor) discusses the principle of alignment together with other interesting design tricks in her book The Non-Designer’s Design Book, a must read!
For instance, she advices to combine alignment with the principle of proximity, which implies that you adjust the spacing between the items according to their relationship to each other. This results in good compositions.

Hope this leads to better and clear lay-outs for your future documents and maybe an extra book on your bookshelf!

How to number your slides

Sometimes it’s handy to have slide numbers to refer to. How to number your slides is fairly easy so I’ll keep it short and simple!

Go to the tab Insert and click on the command Slide Number in the group Text. The dialog box Header and Footer opens. Tick Slide number and choose Apply or Apply to All et voilà, a slide number appears on the slide(s).

dialog box header and footer


Troubleshooting
If this does not work, you will have to change some settings in the Slide Master View.
Go to the tab View and click on the command Slide Master. The first larger slide in the slide thumbnail pane on the right is the Master Layout. This slide controls the associated layouts underneath and is the key to a lot of settings and automatisms, like slide numbers.

Screenshot master layoutClick on the command Master Layout on the tab Slide Master and tick the placeholder Slide Number > OK. Now the Master Layout has the # sign which you can format and position as you want (take the look and feel of your organisation into account).

Master Layout


Each layout positioned beneath the Master Layout has Title and Footers (i.e. date, slide number and footer) as default placeholders. You can tick these placeholders’ checkboxes on or off on the tab Slide Master. So if the slide number does not show up after you’ve adjusted the Master Layout, tick Footers (which include slide number) for each associated layout.
show or hide the footer placeholder

As of now you shouldn’t have any issues displaying slide numbers in normal view. Close the master view, go to the tab Insert and click on the command Slide Number in the group Text. Tick Slide number and choose Apply or Apply to All.

How to make a tri-fold in MS Word

A lot of informational or promotional brochures are made in-house, often by an office, communication or business manager and often in MS Office. Although MS Publisher is the most appropriate application of the MS Office Suite to design a brochure, I explain in this article how to do the job in MS Word. For the reason that most office workers are more familiar with MS Word, also because the wordprocessor uses styles, which are a great help when it comes down to formatting textual content and simply because it is possible!

Starting from a blank (A4) document, this is how you make a trifold.


Go to the tab (Page) Layout, group Page Setup and adjust the following things:
Change the Page Orientation into Landscape.
Open the dropdown menu Margins and choose Narrow
(=1,27 cm or 0.5 inch for Top, Bottom, Left and Right margin)
Open the dropdown menu Columns > More Columns…the dialog box Columns opens.


The Number of columns depends on the desired number of folds: choose two columns if you want to make a bi-fold and three columns if you want to make a tri-fold. Since this article is about tri-folds I choose Three.

The distance between the columns has to be twice the space of the Margins. So if you have margins of 1,27 cm or 0.5 inch the Spacing has to be 2,54 cm or 1 inch.

As a trifold has 3 equal-size panels on each side it is important that the option Equal column Width is checked.

Check also Line between so you can see the fold line between the different columns or panels of the tri-fold. When you’re done with formatting and ready to print, you can uncheck this option again.

Click on OK

Now the document has the settings of a trifold, you can start designing. But which content belongs where? It is difficult to imagine the end result when looking at the blank pages on your screen. So, I advise to take a piece of paper, fold it as a trifold and number each panel to the order in which you would open it. The video below is a guideline.


Thus, the document is to be formatted as follows:

Tips to design your trifold further:

  • Activate your Show/Hide marks (tab Home, group Paragraph)
  • Add column breaks to ensure that each panel of your trifold contains information that stands by itself and makes sense (tab Page Layout, dropdown menu Breaks)
  • Like always, use the color palette and the fonts that are associated with the brand of your organisation. Hey, what did you think? ;)
  • Use Styles to format headings, standard text, list paragraph, quotes,… this is after all one of the advantages of working in MS Word. You can create a new style set or reuse a style set of a previous brochure (on condition that it is consistent with the corporate identity). Go to the tab Design and Save as a New Style Set… or choose a Custom Style Set.
  • Be creative! Change the background colour, insert several similar shapes and fill it with pictures, highlight special text in coloured text boxes/callouts, put one big picture behind the text of panel 2, 4 and 5 or panel 2 and 3 (as suggested in the video),… whatever you do, try to fit all elements within the look and feel of your organisation

On Pinterest you can find lots of examples to inspire you!

I’ve made a basic template for my colleagues of Howest to get started, containing styles and with the right Theme Fonts and Theme Colours. All content is adjustable.

Howest_template trifold
Howest_template trifold 2

And this is an example of a tri-fold I’ve made with the template, it’s in Dutch.

Howest_voorbeeld trifold

Howest_voorbeeld trifold 2


How to format your Excelsheet and improve your productivity

These days it’s all about christmas lights and glühwein, but for many it’s also the end of the fiscal year. And sadly, that means that we are faced with many figures, calculations and formulas. Besides the glühwein this complex data might make your head spin, especially when the info is poorly presented. Time to clear your mind and your doc!

In this article I’ll explain how to display data in an Excel worksheet and which formatting can be set automatically.

The first step to a clear and professional looking worksheet starts, like always, with the theme. Change the theme of the default template into the customized one (that you’ve made) of your organisation (to do so: go to tab Page Layout > dropdown menu Themes > your theme). The corporate fonts and colours are now integrated in the file and also, content like shapes, tables, charts,… that you have inserted or will insert will be based on that specific theme.

Further formatting depends on the kind of information you would like to format:

How to format text into a worksheet
Don’t start each line of text at the beginning of a new row.
It is frustrating to do and confusing for co-workers who want to edit the text but don’t know which cell they have to adjust.


each line of text starts at column A: A4, A5 and A6. The cells next to A4, A5 and A6 are empty.

Don’t resize a cell either to insert all text. That one big cell will be a pain to format the rest of your content. Instead, make it easy on yourself and enter (a) paragraph(s) of text in a text box. Also, in this way you have more functionality at your disposal (text and paragraph editing tools)

If you don’t like the look of the text box of which the outlines do not cover the cells perfectly, you can uncheck the Gridlines on the tab View. But it’s better to do this after you’ve done with formatting, cause they are quite handy when it comes to Ranges of cells and Tables.

How to format typical Excel content like a cell, a range of cells, tables and charts

Cells
The most popular commands are displayed on the tab Home.  For more options, right click on the cell and choose ‘Format Cells…’, you can format Number, Alignment, Font, Border, Fill and lock or hide cells.

But it would take a long time to format each cell manually. For different sorts of content you can use cell styles or set a New Cell Style… (tab Home). If you use these cell styles consistently you’ll obtain a well structured worksheet that enables you to identify the following information at first glance: Good, Bad and Neutral / Data and Model / Titles and Headings /… there are also Themed Cell Styles and each style can be modified.


Tables

You can quickly change the look of a table via Table Styles on the contextual tab Table Tools. These are based on the theme of the document, but if these don’t fulfil your needs, you can also create a New Table Style. Click on the dropdown menu Table Styles > New Table Style… Unlike Styles in Word, it is not possible to copy the direct formatting of a table straight away to create a new table style. You can set the New Table Style as default table style for the document.

A Range (of cells)
As you can format a table quickly via Table Styles, it is clever to convert your range of cells into a table, give it the right formatting, i.e. table style and convert it back again to a Range. The formatting of the table will be maintained. This workaround might save you quite some time!
To convert a range into a table: select the cells, click on the tab Home > Format as Table or on the tab Insert > Table. To convert it back again to a range, click on Convert to Range on the contextual tab Table Tools.

Tip: Unlike the cells of a table, you can merge cells of a range (tab Home > dropdown menu Merge & Center) If you want to merge cells of a range, first give it the right formatting (by converting it into a table, choose a table style and convert it back again to a range, see above) If you convert a range with merged cells into a table you’re asking for trouble!

Header 1 Header 2 Header 3
Cell Cell Cell

Merged cell

Cell
Cell Cell Cell

Range with a merged cell

Header 1 Header 2 Header 3
Cell Cell Cell

Merged cells

Cell
Cell Cell Cell

After converting the range with the merged cell into a table: the merged cell is unmerged.

Header 1 Header 2 Header 3
Cell Cell Cell

Merged cells

Cell
Cell Cell Cell

After converting the table into a range again: the formatting of the table is preserved, but the merged cell stays unmerged.

Tip: If you want to clear the formatting of a Table or a Range, click on the dropdown menu Clear on the tab Home and choose Clear Formats.


Charts
The same for tables goes for charts: they are based on the theme of the document, but you can also adjust a chart and save it as a template.

Before you unpack your christmas gifts don’t forget to pack the workbook as an Excel template: go to the tab File > Save As > Save as type: Excel Template (.xtlx). Now you have a template which you can reuse year after year, you just have to open it as a normal Excel Workbook (.xlsx) and replace the content.

If you want to print the workbook, take a look at the Page Break Preview on the tab View to see how your file will be printed.

Happy holidays!

How to change the font of your document easily

Changing the fonts of a large word file or a PowerPoint presentation with a lot of slides can be either a real pain or a piece of cake. To experience the last, it is necessary to set up your document well from the beginning.

Starting from scratch, this is how it works:
Each theme can have two different fonts: one heading font and one body font. It is prefered to have maximum 2 fonts in this division as a lot of fonts can quickly appear messy, which makes a text more difficult to read.

Go to the tab ‘design’ and click on the drop-down menu ‘fonts’ > ‘customize fonts’, select two fonts you like to use and pick a name for the theme.

Howest fonts

Whether or not you use styles (in MS Word) or slide master (in PowerPoint) make sure you always use this heading or body font troughout the whole document: just by choosing the theme fonts in the dropdrown menu on the home tab (Word or PowerPoint) or by doing the same for each style you use in Word.

themefonts

Now all text is based on the theme fonts. So if you change the fonts of this theme or choose a complete other theme, all text in your document will change along.

No need to adjust the font of each slide (PowerPoint) or each style (Word) one by one, with a couple clicks of the mouse the job is done!

Based on MS Office 2013