How to number your slides

Sometimes it’s handy to have slide numbers to refer to. How to number your slides is fairly easy so I’ll keep it short and simple!

Go to the tab Insert and click on the command Slide Number in the group Text. The dialog box Header and Footer opens. Tick Slide number and choose Apply or Apply to All et voilà, a slide number appears on the slide(s).

dialog box header and footer


Troubleshooting
If this does not work, you will have to change some settings in the Slide Master View.
Go to the tab View and click on the command Slide Master. The first larger slide in the slide thumbnail pane on the right is the Master Layout. This slide controls the associated layouts underneath and is the key to a lot of settings and automatisms, like slide numbers.
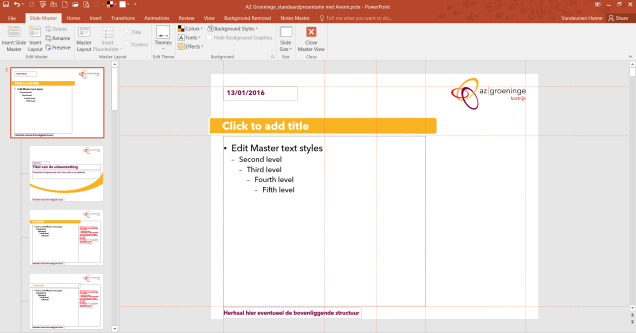
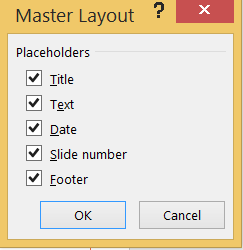
Screenshot master layoutClick on the command Master Layout on the tab Slide Master and tick the placeholder Slide Number > OK. Now the Master Layout has the # sign which you can format and position as you want (take the look and feel of your organisation into account).

Master Layout


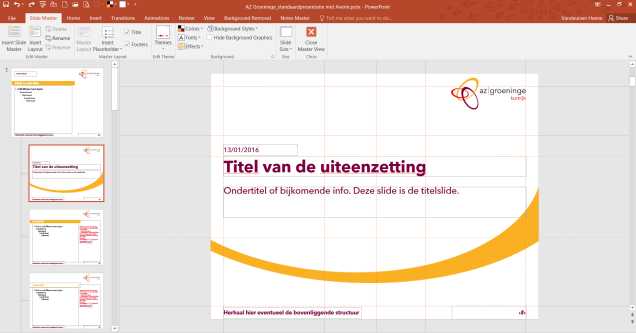
Each layout positioned beneath the Master Layout has Title and Footers (i.e. date, slide number and footer) as default placeholders. You can tick these placeholders’ checkboxes on or off on the tab Slide Master. So if the slide number does not show up after you’ve adjusted the Master Layout, tick Footers (which include slide number) for each associated layout.
show or hide the footer placeholder

As of now you shouldn’t have any issues displaying slide numbers in normal view. Close the master view, go to the tab Insert and click on the command Slide Number in the group Text. Tick Slide number and choose Apply or Apply to All.

How to convert an old presentation into a corporate template

The introduction of an unique Howest template raises the question of how the staff of Howest can apply this template to an existing presentation. How smooth the conversion goes depends on a few crucial factors, just like it did with the conversion of the slide size in my previous post. And also in this story, the pre-set layouts of the Slide master are playing a major role. This proves again how important they are in terms of creating a presentation.


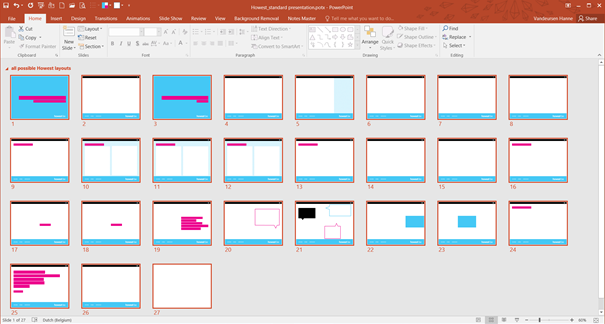
The slide sorter gives an overview of all the possible slide layouts of the Howest template with aspect ratio 4:3

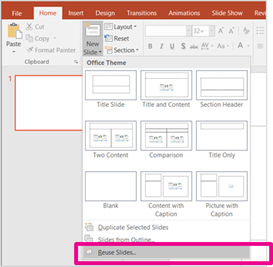
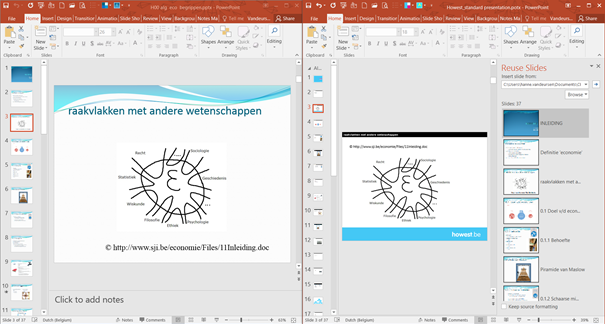
Open the template (like the 3:4 template of Howest in the picture above) that you like to use. Import the slides from an old presentation into this template via the tab Home > drop-down menu of the command New slide > the option Reuse Slides…

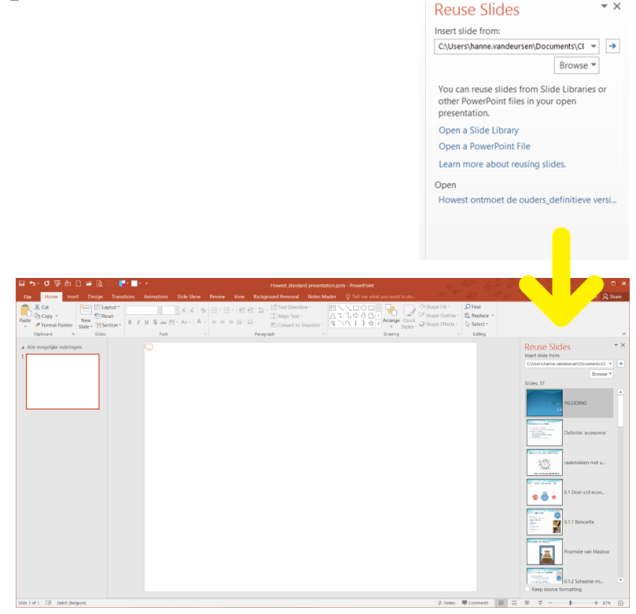
On the right, the window Reuse Slides appears. Locate the slides that you want to insert, either from a slide library or from a PowerPoint file.

window reuse slides

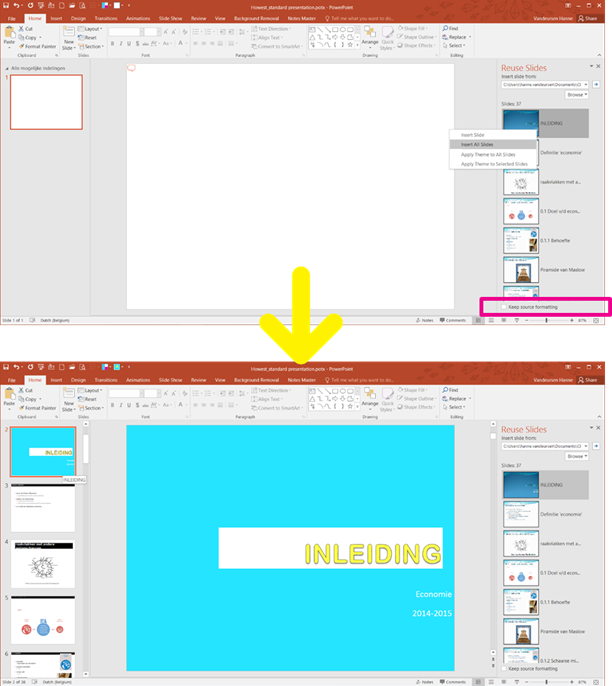
Make sure the option Keep source formatting (below the window) is ticked off before you right click on one of the slide thumbnails in the right window and select Insert All Slides.


The result after inserting all slides into the template, not quite what I had in mind…

How your presentation looks like now and in which degree the result corresponds to the layouts of the template all depends on how your old presentation was created.

If in the old presentation no layouts (or associated placeholders) of the Master View were used, you will have to transfer the content of each slide manually to a proper layout of the template.

But if your slides in Normal view are based on the layouts of the Slide master, the conversion will go more automatic. Though, you’ll still need to verify each slide and you will probably need to make quite a few minor adjustments or choose a better layout for a slide.

To change the layout of an imported slide: Click right on a slide and choose Layout. The selected layout is the current one. You change this just by selecting another one (of the desired template).


The last 5 layouts don’t belong to the original template.

Besides being patient, the best thing to do is to compare each slide in both presentations (the old one with the new one) via the Tab View > Arrange All.

Again, if you have a better workaround, feel free to share!

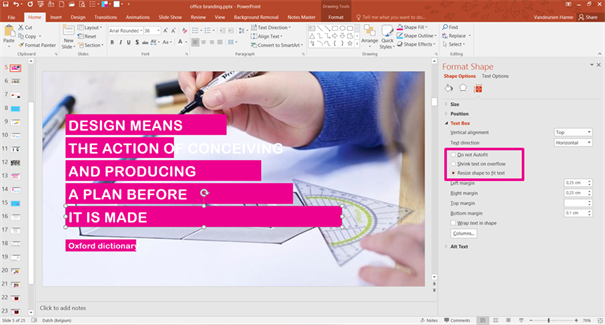
The mystery of the option ‘Resize shape to fit text’

There are a few issues with the PowerPoint template of Howest that both users and I would like to see resolved. Now they cause confusion and lead to an inconsistent Howest look (and most likely we are not the only one with this issue).

Difficulties arise in two specific situations: when users switch the layout of a slide or use the feature ‘Reset’ in normal view. In both situations pink placeholders with the Slide Master settings ‘resize shape to fit text’ are involved.

The Slide master slides contain instructions for the user.

The first time you enter text in such pink bar (in normal view) the size of the bar corresponds to the length of the text. Settings go into effect as you would expect.

But when you use the feature Reset the pink bars take over the bar size of the Slide Master. Although the setting ‘resize shape to fit text’ is checked, the size of the bars do not longer correspond to the length of the text.


The feature Reset “resets the position, size, and formatting of the slide placeholders to their default settings”. This is taken very literally if you click on Reset.

The same happens when you change the layout of a slide with a pink banner via the feature Layout on the tab Home.

To get this right, you briefly need to check another option (for example ‘Shrink text on overflow’) before checking the option ‘resize shape to fit text’ again.

No wonder that this workaround confuses users…

Based on MS Office 2016